
Ohio Heirloom 1888 Bechstein Grand Piano Pinblock Rebuild with CNC & 3D Printing Technology
Brigham Larson PianosFrom 3D Scan to Finished Pinblock: My CNC Post-Processing Workflow
One of the things I've been enjoying most lately is combining traditional piano rebuilding with modern manufacturing tools like 3D scanning, CAD modeling, and CNC machining. As a piano rebuilder, I'm always looking for ways to solve problems that would have been nearly impossible just a few years ago.
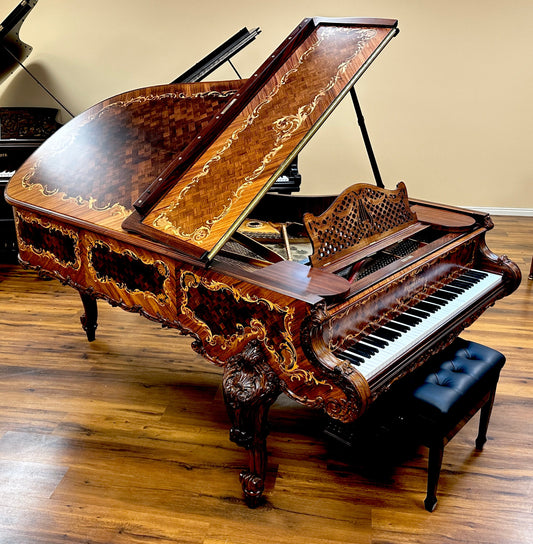
A recent project involved reproducing a highly complex pinblock for an 1888 Bechstein Family Heirloom Grand Piano. The geometry wasn't something I could simply measure with calipers and recreate by hand. Instead, I started with a high-resolution 3D scan, converted that scan into a solid model, and then spent a considerable amount of time refining it into something that could actually be manufactured.
This wasn't simply a matter of pressing "Start" on the CNC machine. In many ways, creating the machining strategy took just as much work as creating the model itself.
Step 1: Capture the Original Geometry
The project began with a detailed 3D scan of the original pinblock. The scan captured virtually every contour, curve, and subtle variation in the original part.
After converting the mesh into a solid model, I recreated the important geometry manually inside CAD software. Certain features—especially the tuning pin locations—required careful judgment rather than simply accepting the scan at face value.
The goal wasn't just to duplicate every imperfection. The goal was to recreate the original part while correcting damage such as cracks and producing a reliable replacement.
Step 2: Prototype Before Cutting the Real Material
One lesson I've learned with CNC machining is that expensive hardwood isn't the place to experiment.
Before touching the actual pinblock material, I machined several prototypes out of MDF.
I'm glad I did.
My first two attempts failed. One program was simply running too aggressively, causing the machine to lose its reference point during rapid tool movements. Rather than discovering that mistake on expensive laminated pinblock stock, I discovered it on inexpensive MDF.
That saved both time and material.
By the third prototype, I had enough confidence to move on to the real thing.
Step 3: Build the Toolpaths
If you've never looked at a complex CNC program, it can be surprising how many individual machining operations are involved.
This project required dozens of separate toolpaths.
The workflow included:
- Facing operations to establish reference surfaces
- Contour cuts around the perimeter
- Drilling plate bolt holes
- Locating tuning pin positions
- Multiple 3D adaptive clearing operations
- Successive finishing passes using progressively smaller ball-end mills
- Precision cleanup around critical flange surfaces
Many operations were created, tested, then suppressed as I refined the process. CNC programming is rarely perfect on the first attempt. It's an iterative process.
Roughing Before Finishing
Most of the material removal was done using larger cutters.
These roughing operations leave behind what machinists often call "terraces"—stepped ridges across the surface.
That's completely normal.
The purpose of roughing isn't to create the finished surface. It's simply to remove material efficiently while leaving enough stock for later finishing passes.
Once the heavy cutting was complete, progressively smaller tools cleaned those surfaces until they matched the original geometry with far greater precision.
The smallest finishing passes removed only tiny amounts of material, but those tiny cuts are what ultimately produce a smooth, accurate part.
Why Precision Matters
Not every surface on a pinblock carries equal importance.
The critical areas are the surfaces that mate directly with the plate.
Those dimensions must be extremely accurate because they transfer the tremendous string tension through the plate into the structure of the piano.
This is where I spent the majority of the machining time.
Using small ball-end mills with extremely fine step-over distances allowed the machine to gradually refine those surfaces until they matched the CAD model very closely.
Those operations take time—but they're worth it.
Learning Along the Way
I've only owned my CNC machine for a relatively short time, and every project teaches me something new.
Each failed prototype improved the final result.
Each programming mistake taught me more about feeds, speeds, toolpaths, and machine behavior.
That's one of the things I enjoy most about this work.
Piano rebuilding has always required patience, precision, and continual learning. CNC machining doesn't replace those qualities—it simply gives us another set of tools to preserve and restore instruments that might otherwise be impossible to save.
Traditional Craftsmanship Meets Modern Technology
Some people wonder whether technologies like 3D scanning and CNC machining replace traditional craftsmanship.
In my experience, the opposite is true.
The technology simply allows us to reproduce extremely complex parts with remarkable accuracy. The real craftsmanship still lies in understanding how the piano functions, knowing which dimensions matter, making sound engineering decisions, and fitting every component correctly during the rebuild.
Modern tools don't replace experience.
They extend it.
As piano rebuilders, we have opportunities today that simply didn't exist a generation ago. I'm excited to continue exploring what's possible, and I look forward to sharing more of what I'm learning along the way.
Do you have a family heirloom piano in need of restoration? Each year, our shop restores around 100 heirloom upright and grand pianos, helping families preserve the music, memories, and craftsmanship of their treasured pianos. If you’re considering restoring your family heirloom, we’d love to evaluate your piano and provide a free restoration quote.